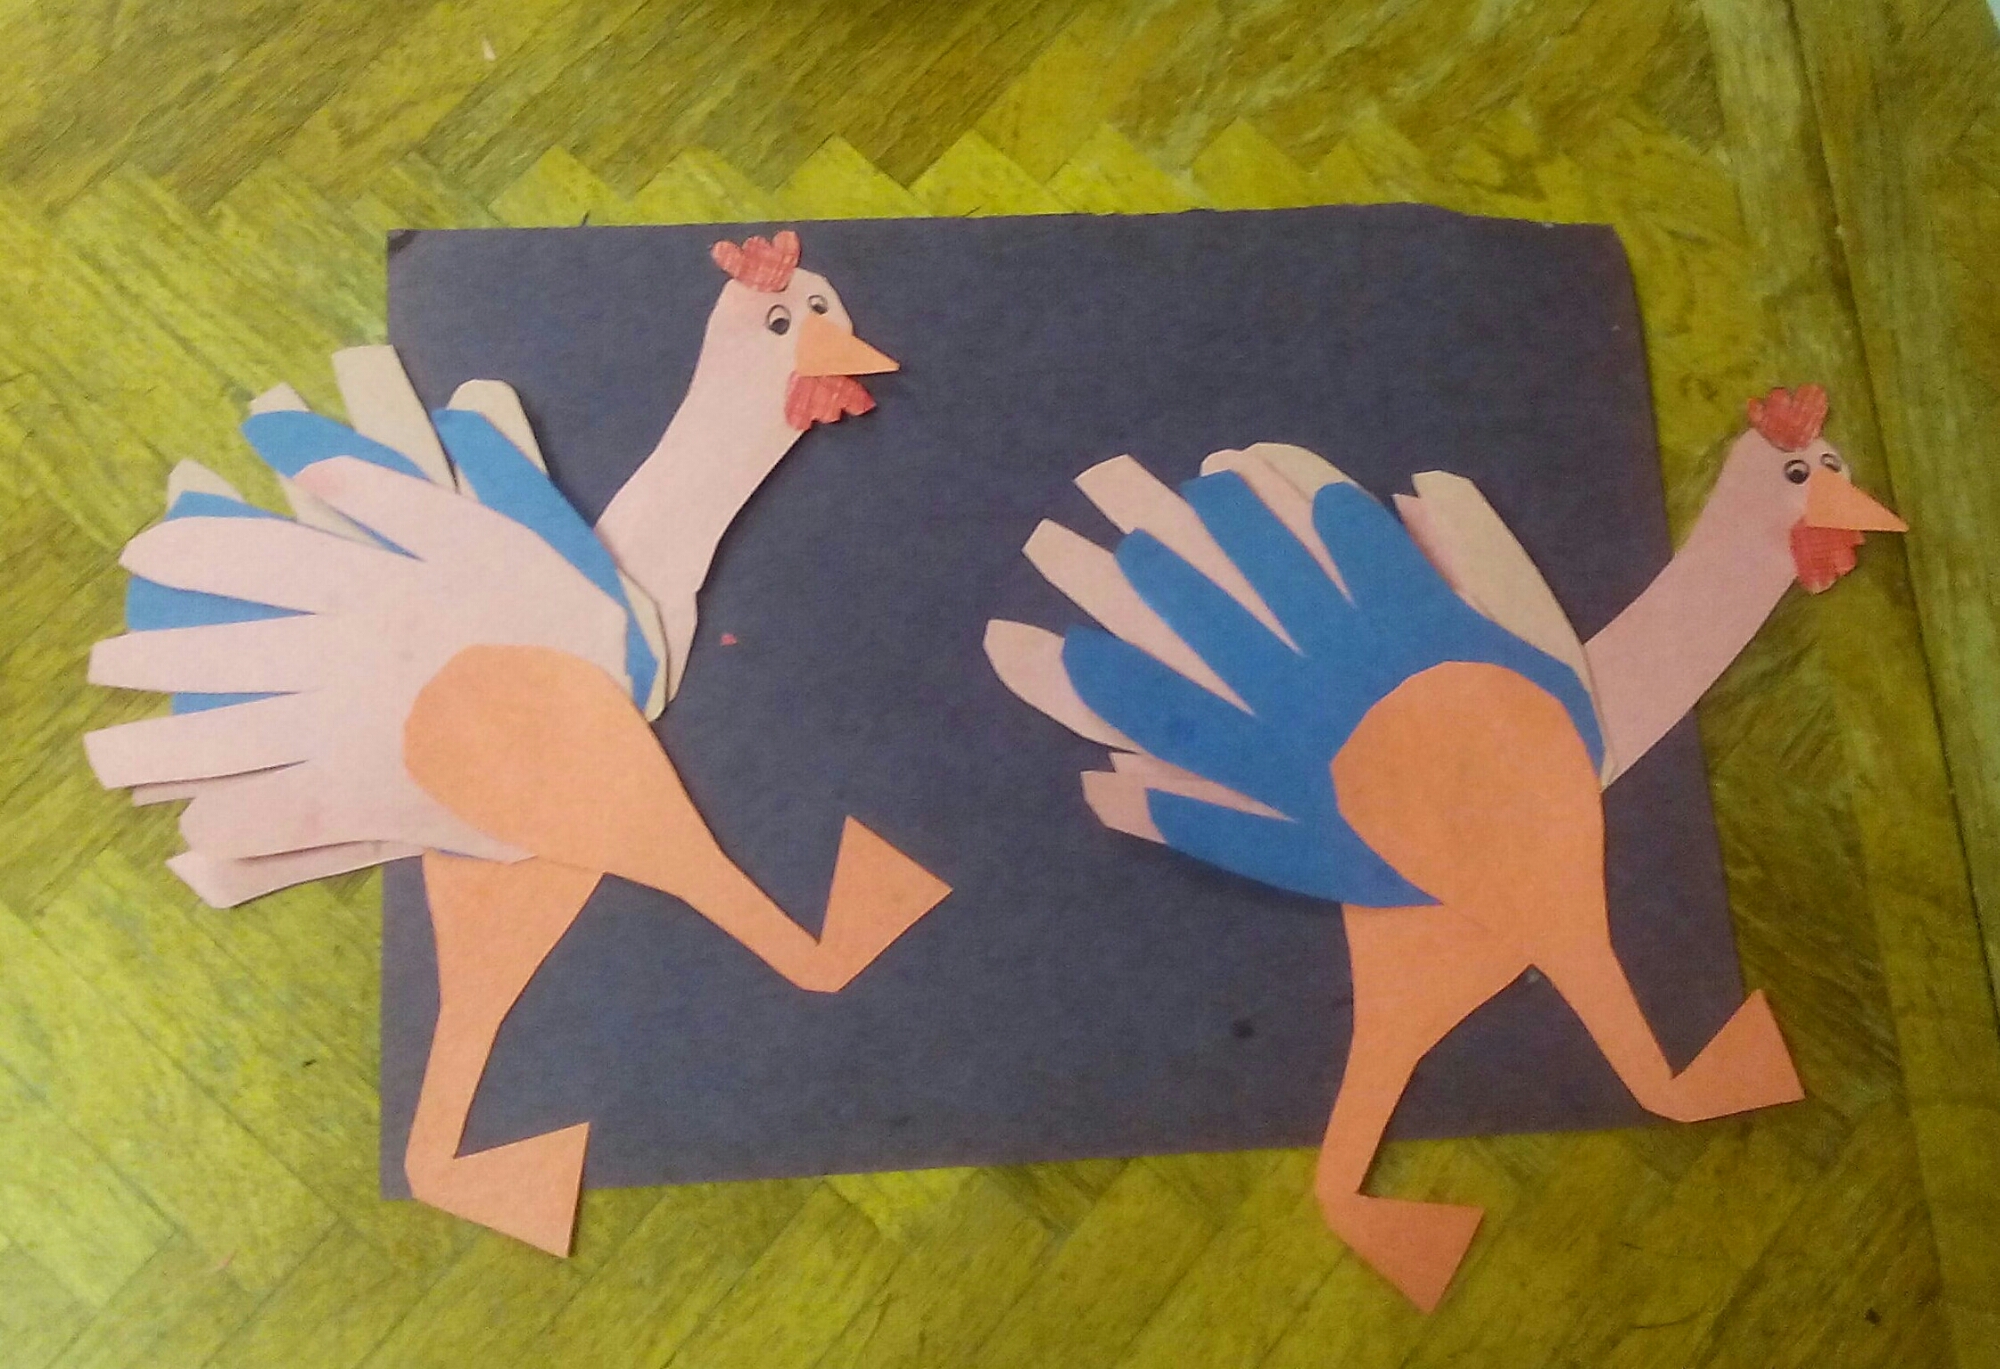
A Quick Handy Thanksgiving Turkey Decoration
Dress up your house, or Thanksgiving cards with home made turkeys this thanksgiving in no time.
*Also try adding some cut out leaves for an autumn feel.Create your own personalized turkeys for you Thanksgiving Decorations.
Family, friends and children of all ages will love your “Handy Thanksgiving Turkeys”.
Use them to decorate your home and Thanksgiving personalized greeting cards.Cut out or collect some colorful leaves to tape up as well and make a window scene. You could also string and hang turkeys and leaves from ceiling. Make a couple extra as Turkey Puppets; options are endless.
I would love to see some of your creative “Handy Turkey’s”. Pull out that craft box and let’s get started. Below I have listed some materials, instructions and pics to get you going. Have fun!
What you need:
- glue stick or white
- colored construction paper
- pen/ pencil
- markers/crayons
- googly eyes (* or marker)
Part 1: The Pieces
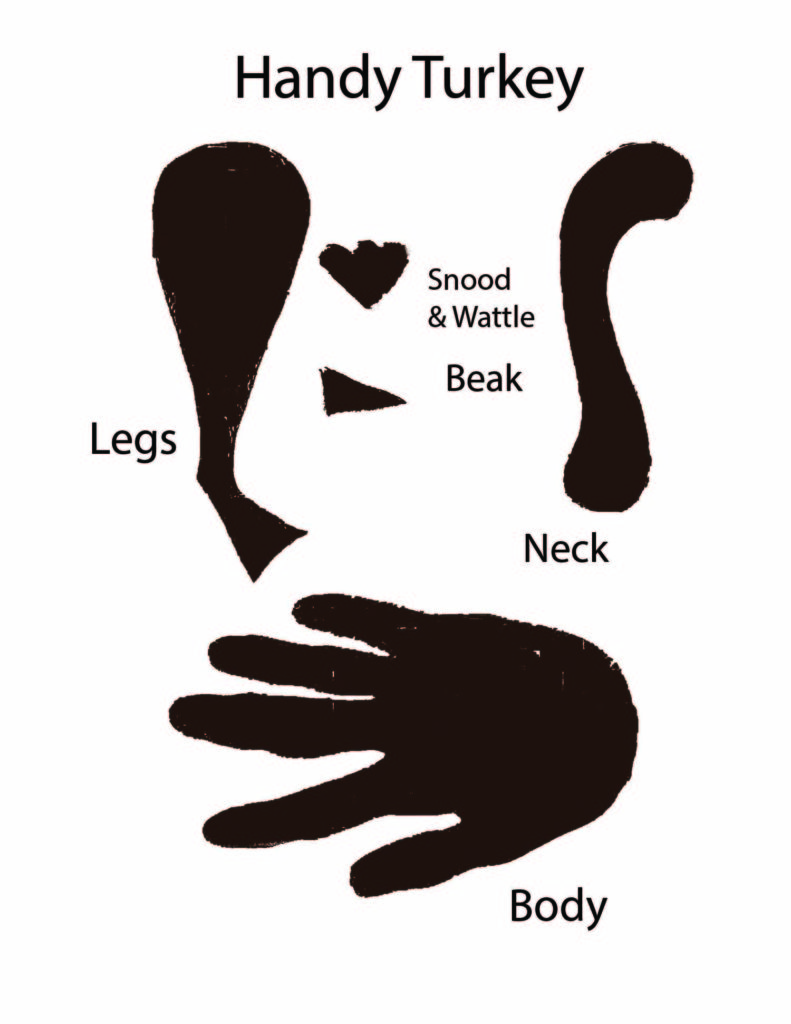
- Body:
-Take 2-3 pages of construction paper.
-Trace both hands on top page
-Cut out hands.
-You will have 4-6 hands… - Neck:
-Fold a page in half for neck
-Draw a head n neck piece. (Kind of a fat stretched S…)
-Cut out
-You should have 2 head n neck pieces. - Legs and feet:
-Fold one page in half
-Draw the shape of a drumstick with a triangle at the bottom
-Cut out
-You should have 2 legs - Beak:
-Fold yellow paper in half
-Draw triangle
-Cut
-You should have 2 yellow pieces. - Chin and head:
-Fold red paper
-Draw a heart with 3 bumps on top
-Cut out
-You should have 2 red pieces
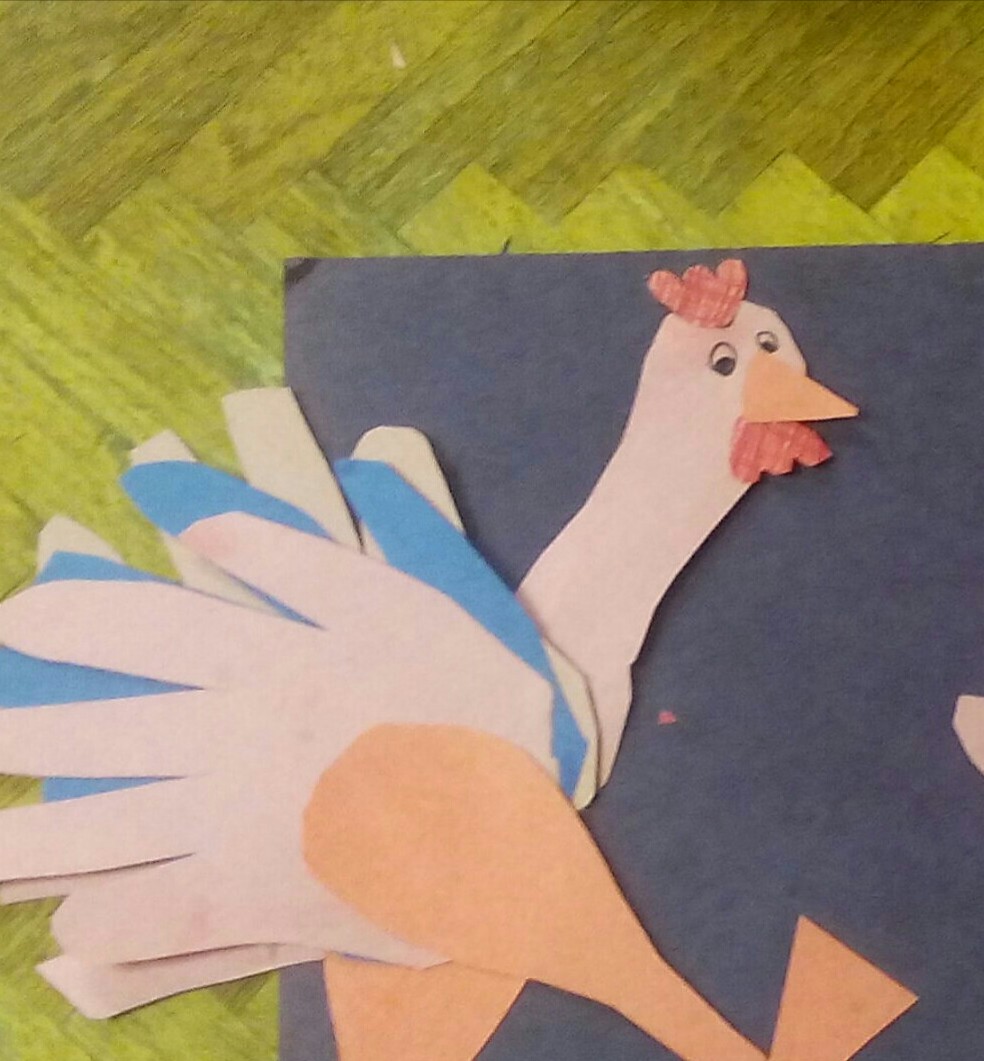
Part 2: Glue
Created by Jennifer Kennedy
- Add glue to middle of cut out hand. Offset the 2nd( & 3rd) hand a little on top of glue.
(You should have 2 offset doubled or tripled hands now)
Head and Neck
- Glue red pieces to bottom and top of head on neck piece. (at 8 and 12 on the head )
- Glue 2nd head n neck piece over top of first.
- Glue beak piece to both sides of head ( at close to 9 o’clock on the head.
(You should now have a turkey neck and head ready for eyes.)
Now like a puzzle, pose your Turkey’s body, legs and neck. When happy glue together.
- Glue bottom of neck in between 2 body piece’s.
- Glue leg piece’s on top of body piece’s.
Part 3: Display
- Put a string on top. Tack to roof
- Tape to a window
- Decorate greeting card
- Use sticks and make into puppets
For Greeting Card:
- Fold card stock ( construction paper) into 1/2 or 1/4’s
- Color with fall colors
- Glue turkey to front
- Write your personalized greeting on the inside and outside
Have fun and enjoy your turkeys. Get your Art and Crafts box out , decorate, be imaginative and creative. Feel free to send me a pic of your Thanksgiving Turkeys or other bird ideas you might have come up with.
Have a happy and relaxing
Thanksgiving 2016
Jennifer Kennedy – The Wet Canvas